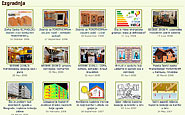
Building with POROTHERM - visual guide - basics
| 16 September 2008 - Comments (0) | Construction |
 As we progress the construction of our project Amadeo with POROTHERM, we have more experience to share with this construction system. It is easy to use and the resulting quality is far above what can be achieve with standard gitter blocks. In this first article, we look at the basic aspects of building with POROTHERM.
What is POROTHERM?
POROTHERM is a line of large clay blocks from Wienerberger. It is a construction system allowing to build monolitic walls with sufficient thermal insulation. The wall itself provides thermal insulation and thermal inertia without any additional layer of thermal insulation material.
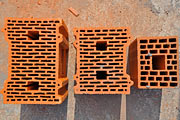
For the construction of Amadeo, we decided to use the best POROTHERM solutions. External walls are made with POROTHERM 38 S P+E PLUS, internal load-bearing walls are made with POROTHERM 30 S P+E PLUS and partition walls are made with POROTHERM 8 P+E. POROTHERM 8 P+E is also used in combination with corner elements for making vertical reinforcements, as we will see.
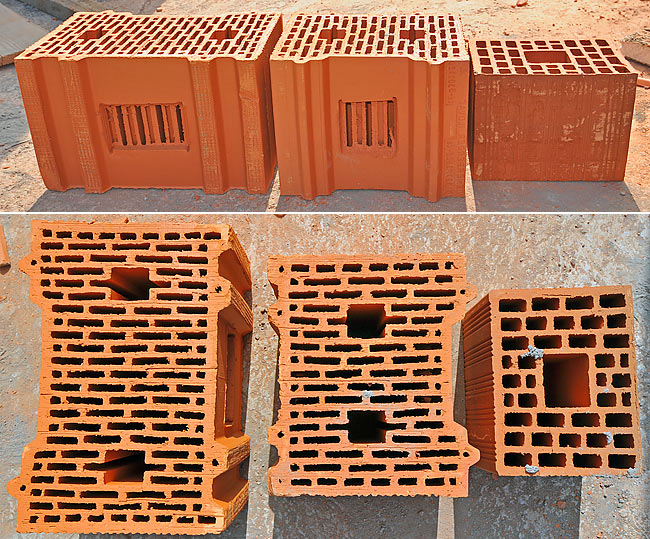
A comparison of POROTHERM 38 S P+E PLUS (38cm long, 25cm wide, 23.8cm high), POROTHERM 30 S P+E PLUS (30cm long, 25cm wide, 23.8cm high) and a standard gitter block (25cm long, 19cm wide, 19cm high) (photo Beodom).
Unlike standard gitter blocks, POROTHERM sides are made to connect with the next block like a lego system. Therefore, there is no vertical joints between POROTHERM. Between 2 lines of POROTHERM, there is a horizontal joint, about 1cm thick, that is done with a special thermal mortar to prevent heat loss. We work with Baumit ThermoMörtel 50.
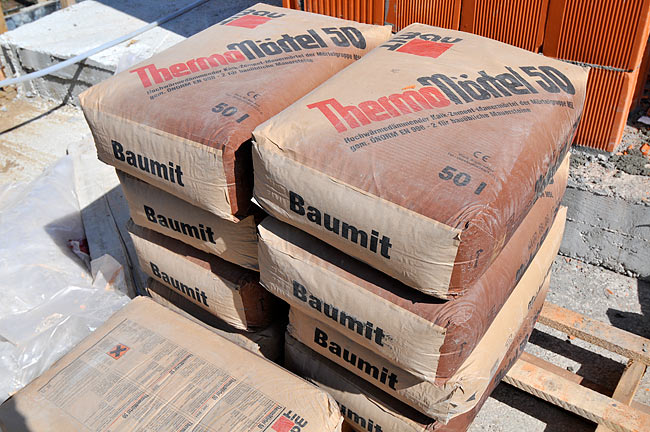
Baumit ThermoMörtel 50 bags on Kuće Beodom Amadeo construction site (photo Beodom).
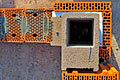
POROTHERM antiseismic feature
POROTHERM blocks have a special antiseismic feature on their side, in the form of a hollow part covered with a grid. That part is filled with thermal mortar, as the blocks are used, to reinforce the cohesion of the wall.
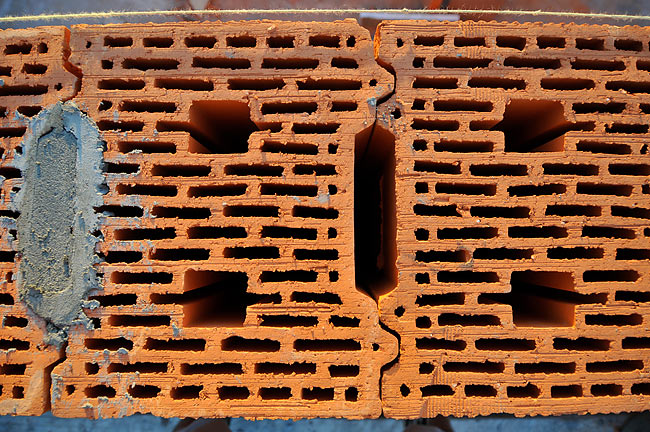
POROTHERM 30 antiseismic feature after and before it is filled with thermal mortar (photo Beodom).
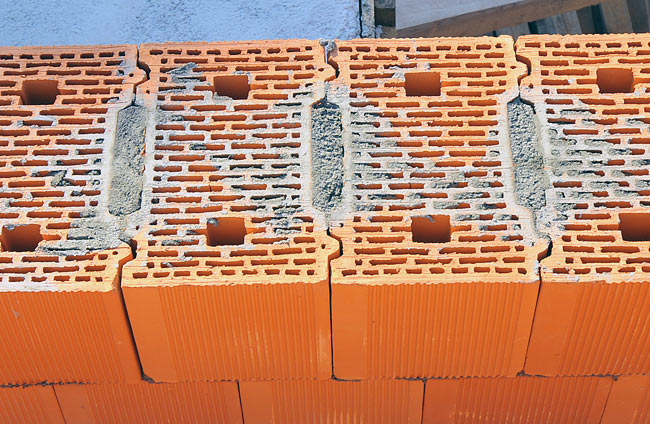
POROTHERM 38 antiseismic feature once filled with thermal mortar (photo Beodom).
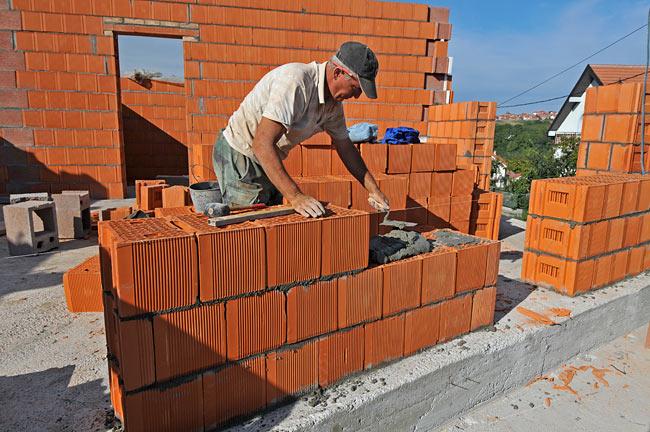
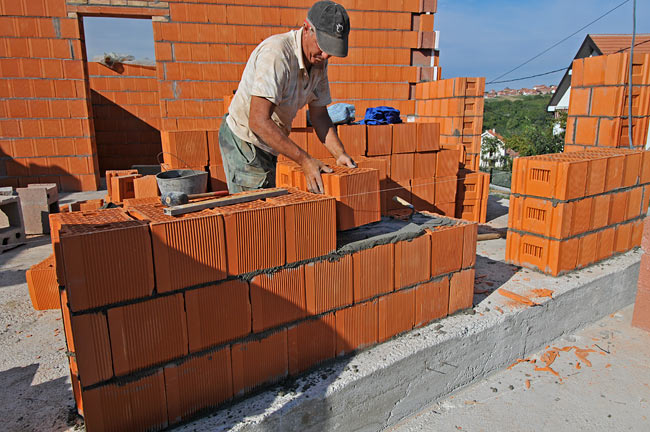
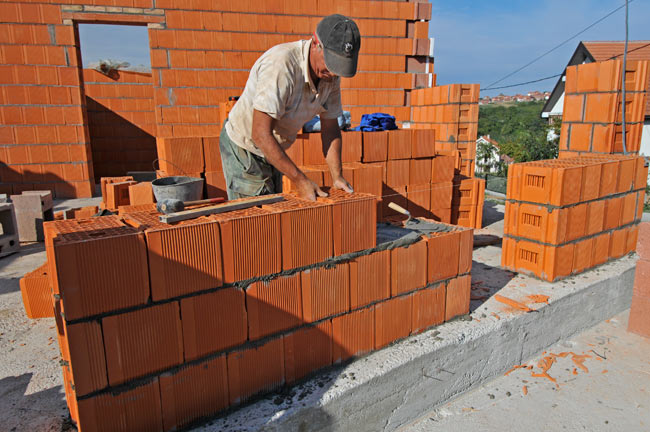
Working with POROTHERM
Here is an example with POROTHERM 38. Starting from a given line of POROTHERM, the space of the antiseismic feature is filled with thermal mortar.

Filling POROTHERM antiseismic feature with thermal mortar (photo Beodom).
The next line of POROTHERM can then be started. Thermal mortar is spread on the line below. A POROTHERM block is exactly 23.8cm high. The horizontal layer of thermal mortar should be around 1.2cm so that one complete line is about 25cm high. It takes 4 lines of POROTHERM to make 1 meter.
Spreading thermal mortar on the line of POROTHERM below (photo Beodom).
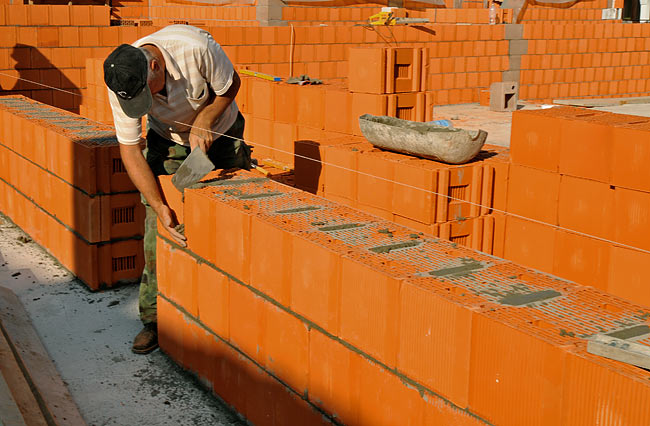
One POROTHERM 38 block is positioned and slided in place, connecting to the one before.
Positionning and sliding a POROTHERM 38 block in place (photo Beodom).
The last step is to control levels and fine tune the position with a rubber hammer. The excess of mortar is removed on each side.
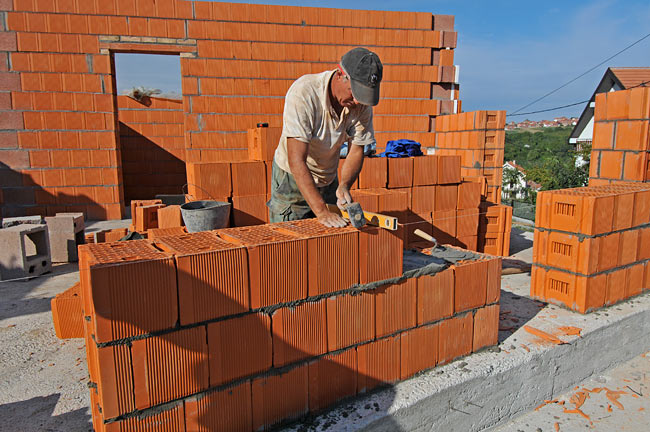
Controlling levels and fine tuning the position of a POROTHERM block with a rubber hammer (photo Beodom).
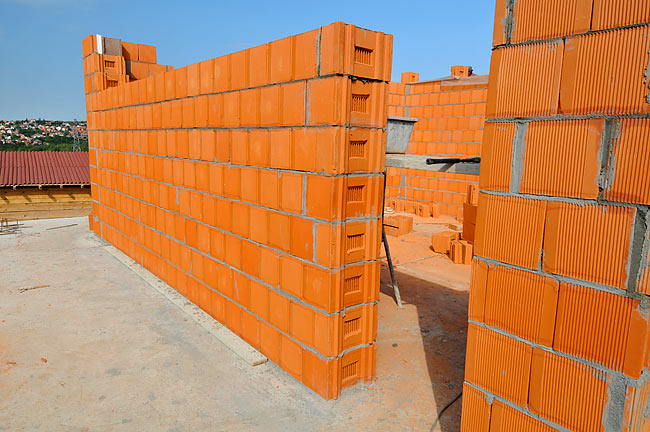
The final POROTHERM wall has no vertical joints and each line of the wall (block + joint) is 25cm tall.

A POROTHERM wall in perpective showing the lack of vertical joints (photo Beodom).
Cutting POROTHERM
Because of their size and hardness, specific tools have to be used to cut POROTHERM. A very common one is a long electric saw. We used DeWALT Poroton-Alligator DW393. Other brand are also available.
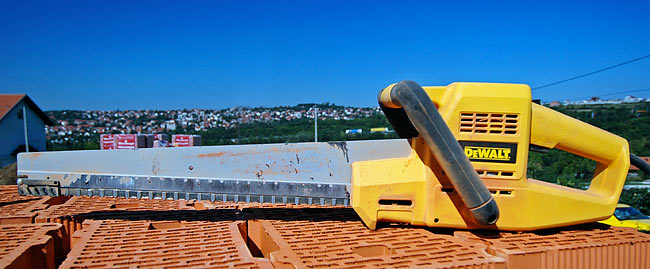
DeWALT Poroton-Alligator DW393 (photo Beodom).
The saw has to be used properly to prevent break down.
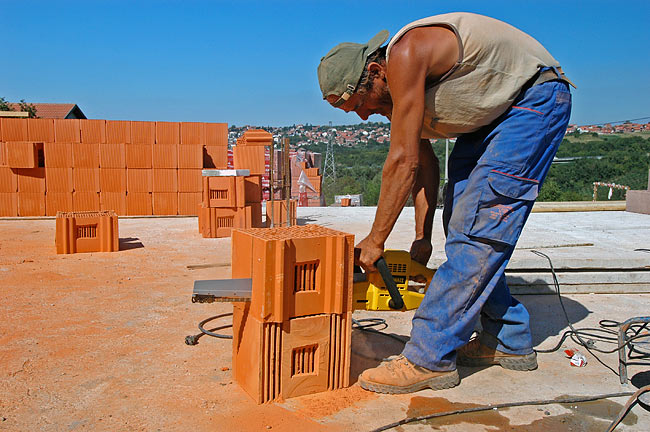
Cutting a POROTHERM 30 block using DeWALT Poroton-Alligator (photo Beodom).
When cutting, the fine dust originating from blocks is a health hazard as it can be breathed in and end up in the lungs. It is therefore better to wear a protective mask. It is also recommended to wear protective glasses.

Cutting a POROTHERM 38 block using DeWALT Poroton-Alligator (photo Beodom).
Alternatively to Poroton-Alligator, a circular saw with a diamond blade can be used. Problem is the fact that it is impossible to find a circular saw with a sufficient diameter to cut POROTHERM in one pass (blocks need to be turned) and that it produces much more dust than Poroton-Alligator.
We tried a top of the line circular saw, Husqvarna K 1250, that is petrol based and can do wet cutting to prevent dust. But the trial was not very conclusive. Biggest problem is the fact that, during construction, cuts are always sporadic. Having an electric saw is a necessity.
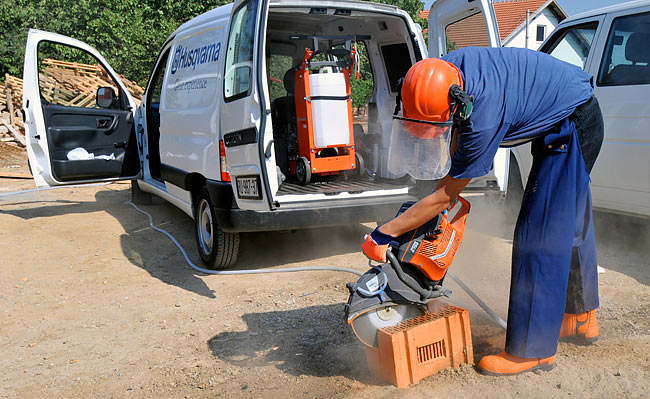
Cutting a POROTHERM 38 block using Husqvarna K 1250 (photo Beodom).
Making openings
When making openings, POROTHERM blocks have to be cut to exactly match the remaining space between the last full block and the opening. In order to get a nice finished surface on the side of the opening, the side of the POROTHERM block that is cut, is always turned toward the previous block.
The side of an opening made with the nice side of the POROTHERM blocks (photo Beodom).
Because the cut side of POROTHERM, that is turned toward the previous block, is irregular, it is necessary to fill the space between that side and the previous block with thermal mortar.
Filling the space between the cut side of a POROTHERM block and the previous block (photo Beodom).

Openings in a POROTHERM wall once finished (photo Beodom).
Dealing with non straight corners
There isn't any special POROTHERM element available in Serbia to deal with non straight corner (it does exist in France). The simplest solution is to cast the corner and to pour concrete. Tarolit is used for thermal insulation. We had 2 such corners in Amadeo.
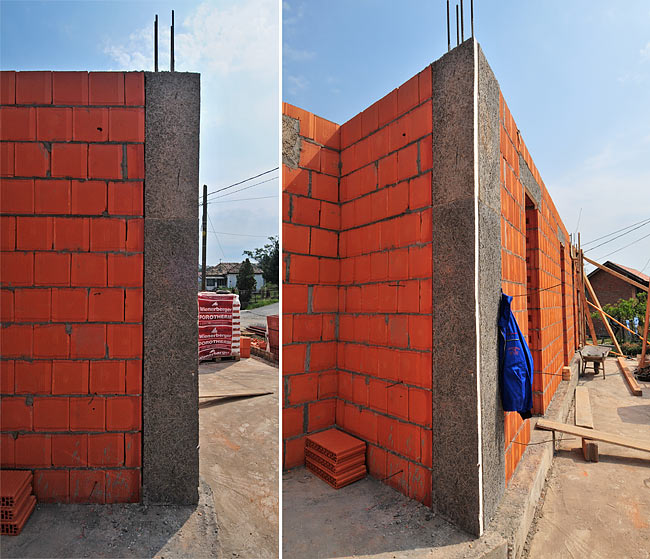
Example of a non straight corner done with concrete and Tarolit (view from the side) (photo Beodom).
The corner is merged into the floor slab, before to start again the same way for the next floor up.
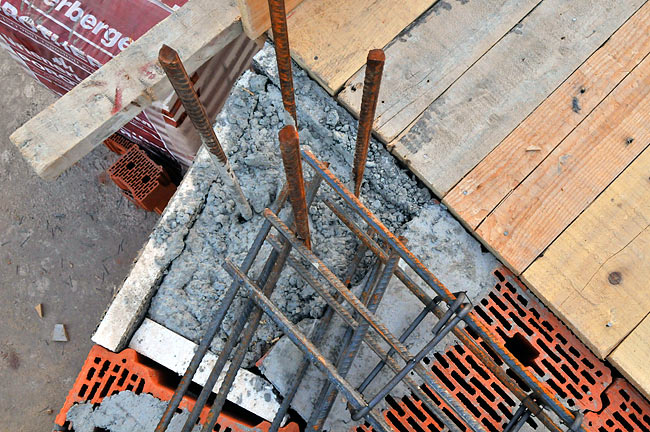
Example of a non straight corner cast with concrete and Tarolit (view from the top) (photo Beodom).
We will continue to look into corners, vertical reinforcements and lintel in the upcoming next part.