Installation of an underfloor radiant heating and cooling system
| 05 December 2010 - Comments (0) | Construction |
 The heating and cooling system is a key component of any dwelling for providing comfort all year round. Heating systems are formed of 3 components : the energy source, the heat production and the heat distribution. In this article, we focus on one type of heat distribution system, showing the installation of a hydronic radiant low-temperature underfloor heating and cooling system.
Energy source
Producing heat or cold is a process that consumes energy. Traditional energy sources for space heating are wood, natural gas, coal, oil and electricity which itself is generated from a primary source of energy. Renewable energy has been growing in use as an energy source for space heating and biomass (wood chips and pellets) and geothermal energy are 2 most favored options.
We ourselves used geothermal energy in our 2 previous buildings. Geothermal energy applied for space heating uses the fact that the ground has a temperature of 11-12 degree Celsius from a 6m depth. The temperature of the ground increases by about 3°C every 100m. By circulating a fluid in an underground closed loop, it is possible to exchange heat energy with the surrounding ground.
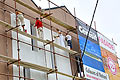
Connection of geothermal probes for Amadeo II, outside and inside the building (photos Beodom).
One big advantage of a geothermal system, besides providing free non polluting energy, is the fact it can work to provide heat by circulating a fluid at a lower temperature than the ground or cold by circulating a fluid that is at a higher temperature than the ground. The system is reversible and can be used all year round.
Heat production
The standard way to produce heat is to burn the fuel used as energy source in a boiler to heat up water. In case of electric heating, a resistance is used to convert electric energy into heat. In case of geothermal energy, a compressor transfers heat by means of circulating a refrigerant fluid around a compression–expansion cycle. That is the role of the geothermal heat pump.
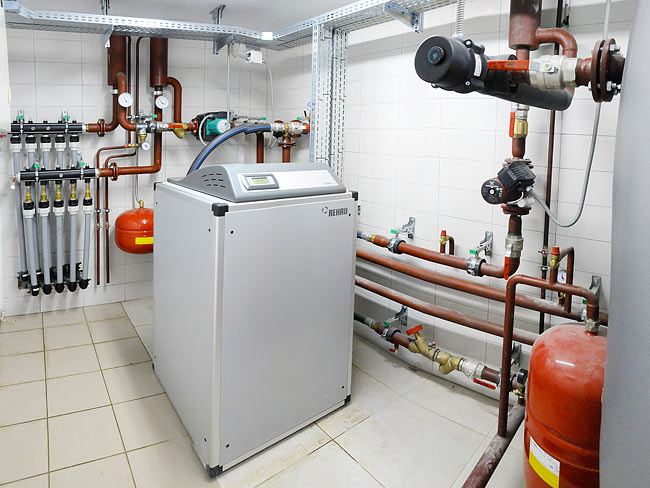
Geothermal heat pump installed in the technical room in Amadeo II (photo Beodom).
The geothermal heat pump runs with electricity and extract heat energy from the ground. Heat energy produced by the heat pump is the sum of the electric energy consumed and the heat extracted from the ground. Usually, the geothermal heat pump extract 3 to 5 times more energy from the ground than the electric energy input.
Heat distribution
Putting aside electric space heating, heat production involves heating up water that is circulated in the space to heat for distribution. Radiators are commonly used. The larger the radiators, the lower the temperature of water inside the radiator needs to be. Circulating lower temperature water has several advantages. It is more efficient, losses are less, it is more pleasant in the room and heat production can better be optimized (condensing boilers, geothermal).
Hydronic, low-temperature, radiant underfloor heating
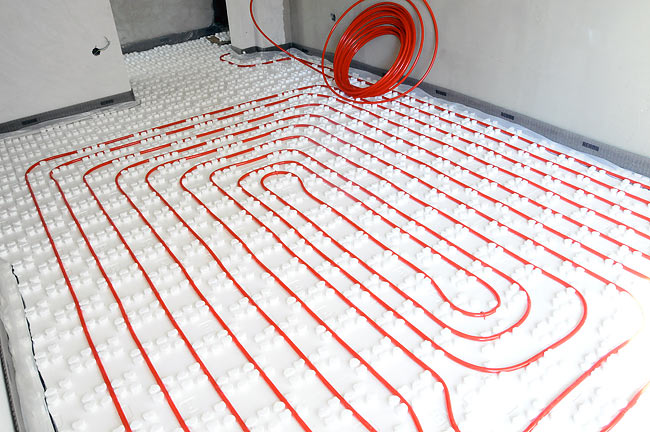
Pushing this logic further, what if radiators were evenly distributed in the completed room. That is the idea of the underfloor heating. Make the complete floor the radiator. Such a heating system is called hydronic, low-temperature, radiant underfloor heating system. Hydronic means it circulates water. Low-temperature means that water circulating in pipes underfloor is not much hotter than the room temperature. Radiant means that most of the heat is actually distributed in the room by radiations (heating bodies and not air) rather than by convection (movement of hot air) like conventional radiators.
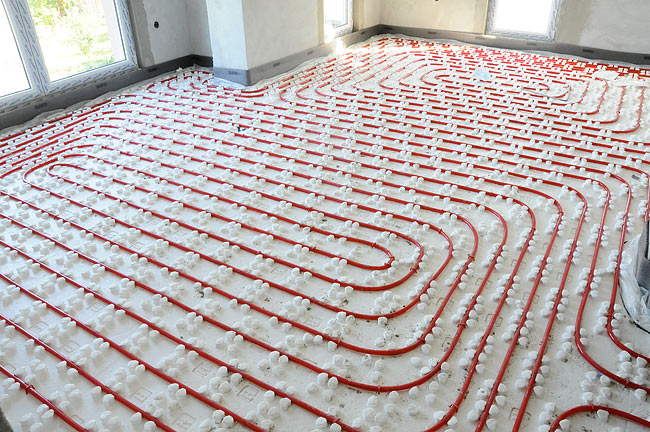
Hydronic, low-temperature, radiant underfloor heating installed in Amadeo II with Rehau RAUTHERM pipes (photo Beodom).
The hydronic, low-temperature, radiant underfloor heating system is certainly the best space heating distribution system:
- it doesn't take any space in the room (no ugly radiators gathering dust and spider webs),
- it is the most efficient because of the low-temperature of water circulated,
- it provides an uniform temperature in the room,
- because it is a radiant system, it provides increased comfort and doesn't move dust (little convective currents).
The one aspect of the underfloor heating that can be considered as a drawback is its slow response time. It has a lot of inertia and it can takes many hours before to feel heat from the starting time. In fact, this can be seen as a drawback as much as a positive aspect depending of the use of the space. For permanently occupied dwellings, inertia is a plus because it evens out temperature variations in the room. For intermittently used space, where heat may be needed sporadicly, inertia will be a drawback.
Because it is low-temperature, the underfloor heating is the perfect distribution system when coupled with a geothermal heat pump.
What about cooling?
Cooling can be distributed the same way as heating using the underfloor distribution. This is the cheapest and simpler solution because everything is already installed anyway. This is the one solution we took for Amadeo II.
Yet, there are 2 drawbacks in doing cooling using the underfloor loop. The first one is that it is not optimal. Hot air natural rises and providing cooling on the floor does not allow an optimal distribution of the cooling effect. The second one is the risk of triggering the dew point and have condensation on the floor. For this reason, the temperature of water circulating in the underfloor system for cooling is controlled not to drop below a given limit, therefore limiting further the cooling effect.
There are other solutions to distribute cooling. The first one is to use additional fancoil units in the apartments. This can be used instead or as a complement of having underfloor cooling. The second one is to install ceiling cooling with additional loops on the ceiling. This is the most optimal way of distributing cooling but also the most costly.
From there on, we look at the pratical installation of an underfloor heating system.
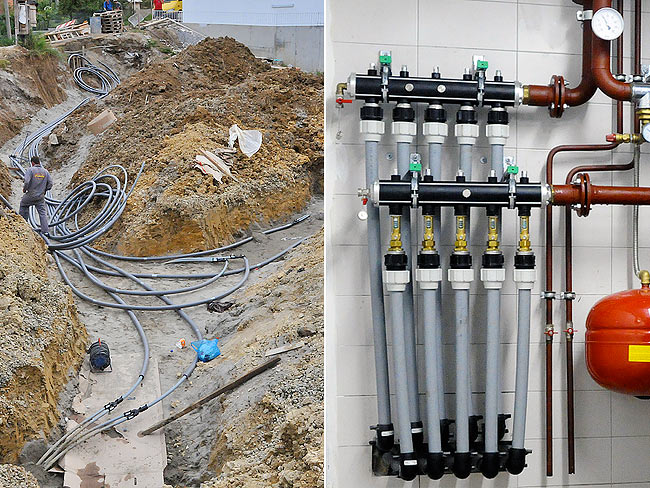
Installation of verticals and manifolds
Installing an underfloor heating system starts out by passing verticals that connect each apartment with the technical room where heat is produced. The number of verticals entirely depends on the configuration of the building.
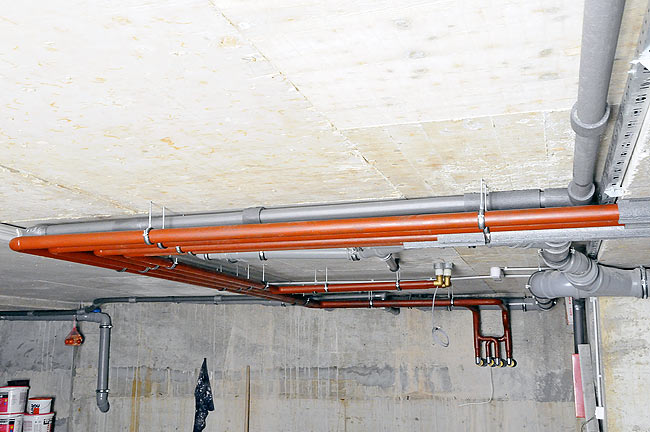
Pipes for the distribution of heat in Amadeo II, connecting verticals with the geothermal heat pump (photo Beodom).
Each vertical is made of two pipes, one for the outgoing flow from the heat pump and one for the return flow from apartments. The dimensioning of the pipes is done depending of how many apartments are connected to the vertical. Each vertical provides heat to a stack of apartments. In each apartment, the 2 pipes of the vertical are connected to a cabinet hosting 2 matching manifolds (outgoing and return flow).
Installation of the verticals in one apartment in Amadeo II (photo Beodom).
Manifolds split the flow of water into several loops, usually one loop per room in the apartment. The bigger the apartment, the more loops and the bigger the manifold.
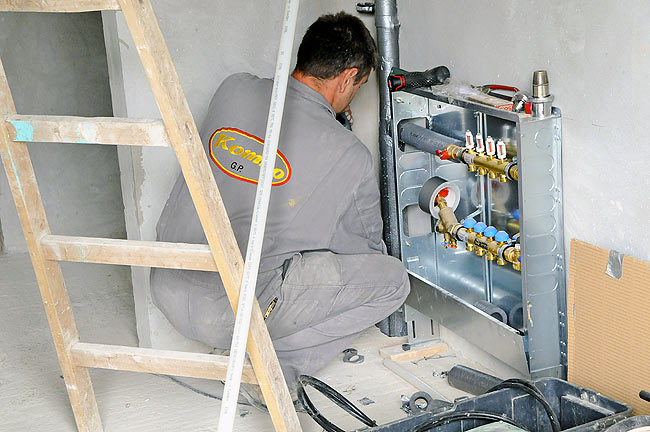
Manifolds being connected to the verticals in one apartment in Amadeo II (photo Beodom).
Once all verticals and manifolds are installed, the installation of the underfloor part can start.
Steps of installation of the underfloor part
If the concrete slab is not smooth enough, which is usually the case, it has to be prepared by removing all asperities and bumps. From the prepared concrete slab, several layers are placed : sound insulation layer, thermal insulation layer, support for the underfloor heating pipes, pipes, screed and flooring. Of course, thicknesses and choice of material may vary greatly from one project to the next. We present here the solution we used in our project Amadeo II. Additionally, the complete stack of layers must be kept away from the walls. This is done with a special strip that is placed all around walls.
Strip around walls
Rehau Edge Insulation is placed all around walls. It dissociates the floor from the walls. This is excellent for sound insulation and makes a necessary dilatation join.
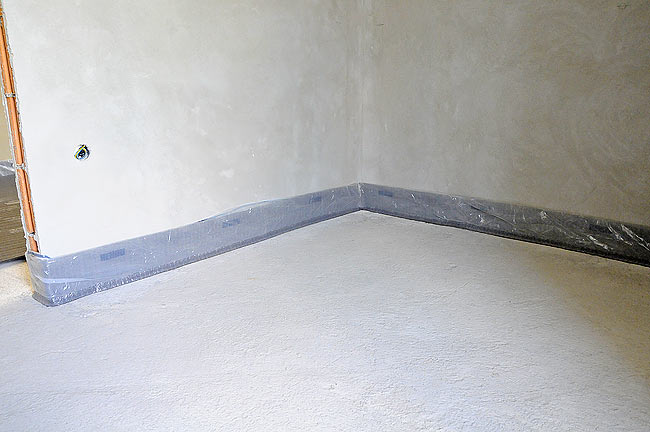
Rehau Edge Insulation installed in Amadeo II (photo Beodom).
Sound insulation layer
We used Izoterm Thermosilent 52 in 1cm thickness. Thermosilent is made of expanded polyethylene. It is a good sound insulation layer and also provides some thermal insulation.
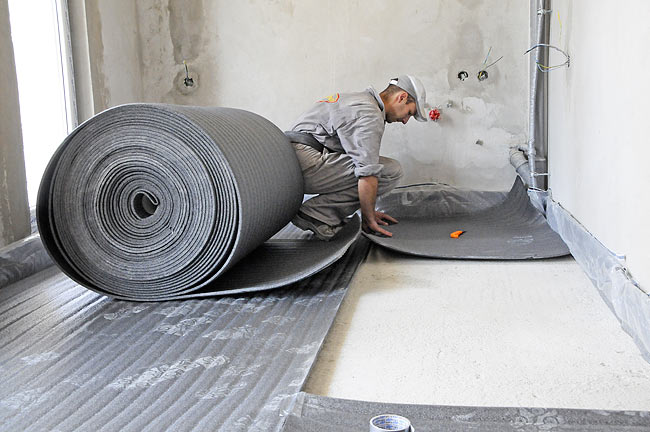
Application of Thermosilent 52 in Amadeo II (photo Beodom).
Thermal insulation layer
On the ground floor of Amadeo II, above the underground parking, we added a layer of thermal insulation (7cm) using high density extruded polystyrene. On other floors, this was not necessary because apartments were below.
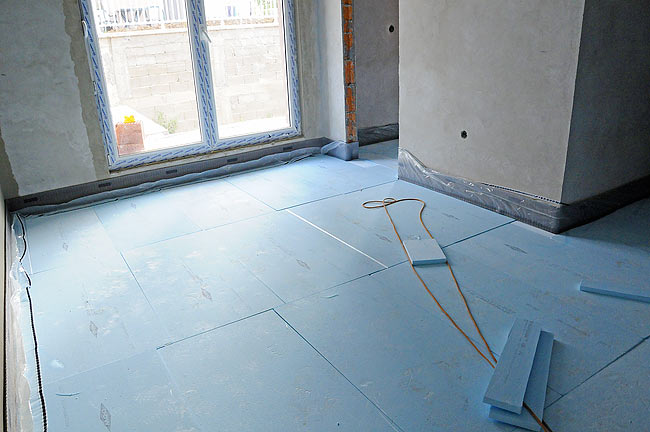
Layer of extruded polystyrene installed in Amadeo II (photo Beodom).
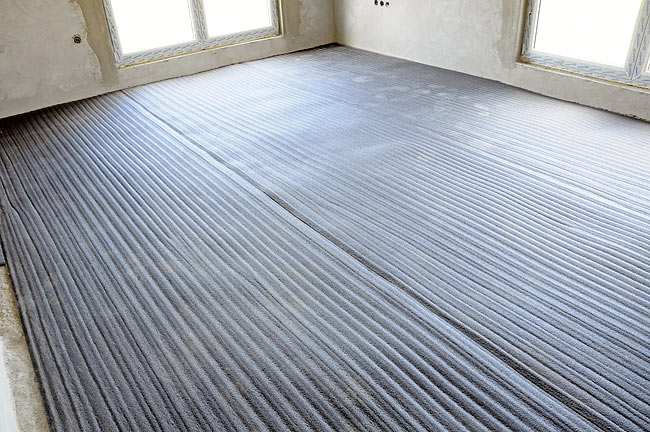
Support for the pipes
There are several systems for fixing underfloor heating pipes. A popular one that we used is made of boards with protruding elements allowing to pass the pipe between them. Rehau Vario boards also provide a layer of thermal insulation (2.3cm) which is necessary to make sure the underfloor heating pipe does not heat the ceiling of the apartment below.
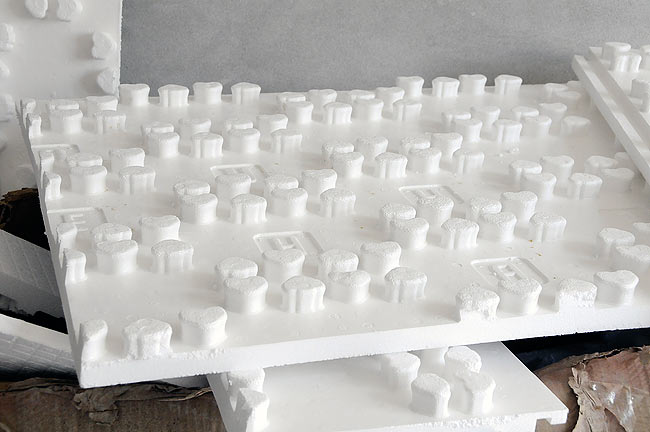
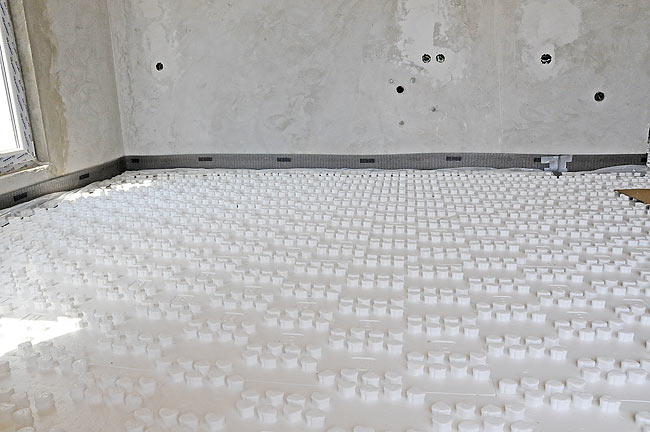
Rehau Vario board in Amadeo II (photos Beodom).
Heating pipes
Heating pipes are installed directly on Vario boards. Pipe quality is very important in an underfloor heating system and we used PE-Xa pipes Rehau RAUTHERM with an oxygen diffusion barrier.
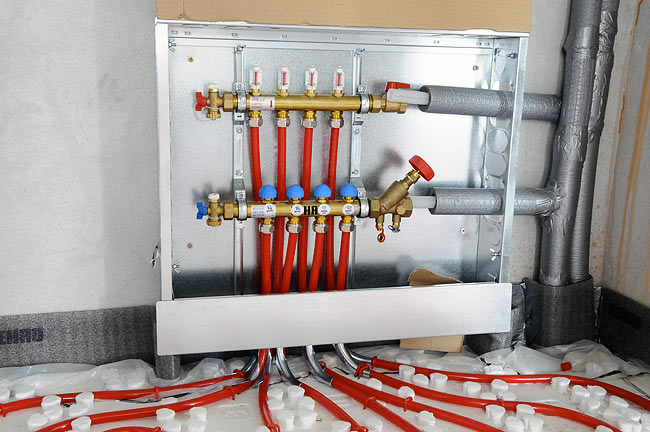
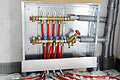
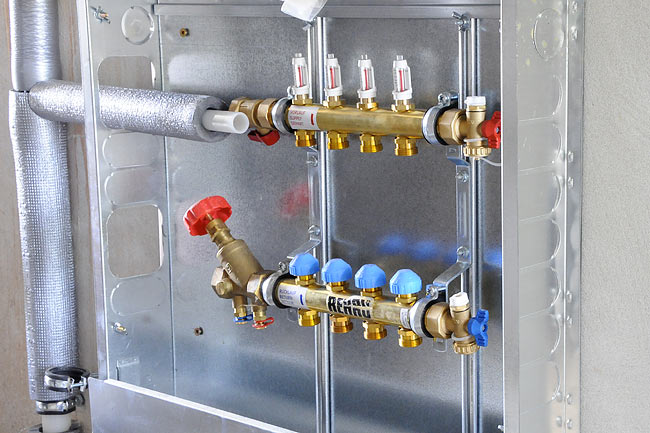
Manifolds connected to 4 underfloor loops in one apartment in Amadeo II (photo Beodom). The supply manifold (up) receives the incoming flow of water from the system, and the return manifold (down) sends back the outgoing flow of water after circulation in the underfloor loops.
One underfloor loop being installed in one apartment in Amadeo II (photo Beodom).
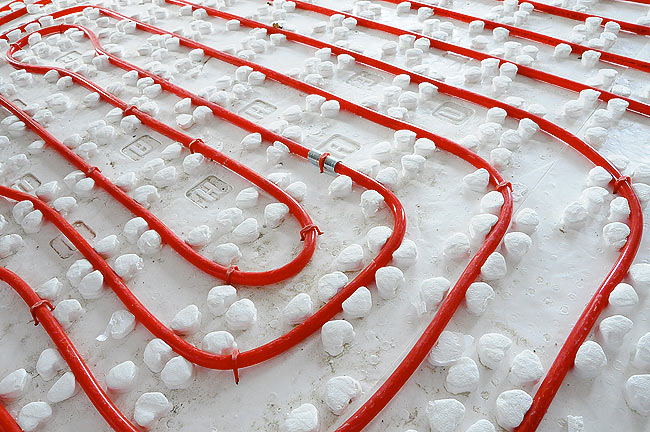
Closeup on Rautherm underfloor heating pipe installed in Amadeo II (photo Beodom).
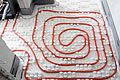
In order to uniformly spread heat, all underfloor heating loops are installed as a double spiral where the return flow always alternate with the incoming flow. This because the pipe carrying the incoming flow is more hot than the return flow (it lost less heat).
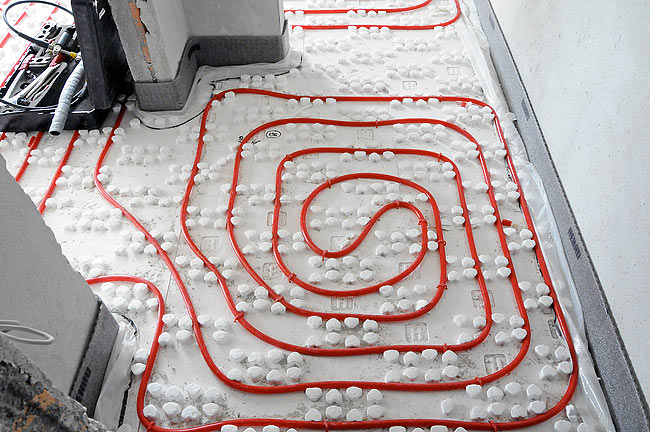
Double spiral with Rautherm underfloor heating pipe (photo Beodom).
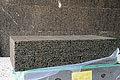
Sand and cement floor screed
On top of the pipes, a screed made of sand, cement and a special Rehau additive is poured. The screed act as the radiator in the underfloor heating system. Hot pipes heat up the screed which uniformly diffuses heat in the room through radiation and convection. The screed has to be thick enough to ensure its role. It was 7cm in Amadeo II. Through its mass, the screed also makes up the inertia of the system which gives better comfort with more constant temperatures.
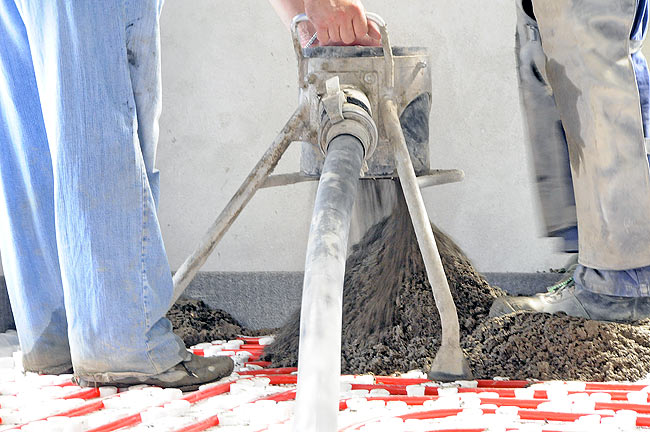
Pouring the sand and cement mix for the screed in Amadeo II (photo Beodom).
Screed technical data (update)
Following up one question in the comments, we provide here the technical data about the type of screed we used. It is a half dry screed of granulation 1. 280kg of cement is used for each 1 cubic meter of sand. Additives represent 1% of the cement part (2,8 kg of additive for 280kg of cement). They are used to improve the elasticity of the screed.
The screed has to be left at least 30 days, before the underfloor heating can start, for the process of hydration to complete. During this period, the screed has to be protected not to dry too fast so that it doesn't crack.
When the underfloor heating starts up, the screed has to be warmed up gradually to the working temperature. From the temperature of the screed, the increase of temperature should not exceed 5°C/day. In our case, we started the underfloor heating in Amadeo II when the temperature was already 20°C so that we didn't need a gradual warm up.

Equalizing the sand and cement mix (photo Beodom).
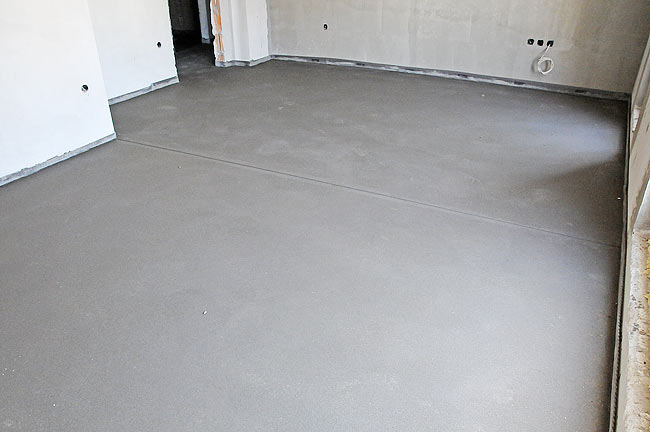
The screed once finished (photo Beodom).
Flooring
Underfloor heating is compatible with many types of flooring such as tiles, laminate, parquet and thin wood floor. Some types of wood are not recommended because the underfloor heating makes them too dry and the wood structure makes them crack. You just need to check with the manufacturer for compatibility.
In case the underfloor distribution is used for cooling as well, then tiles is the recommended flooring. That is what we did in Amadeo II.
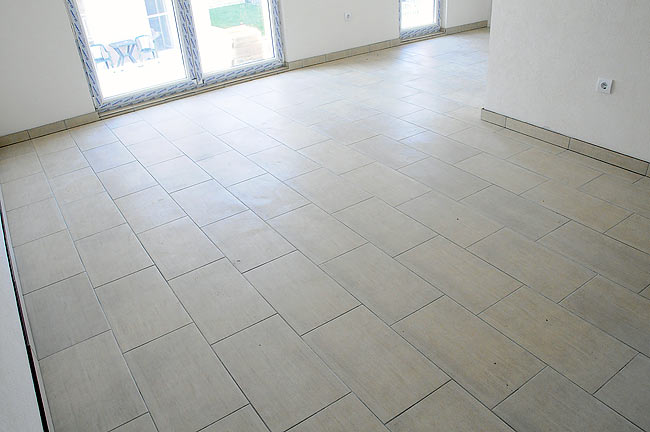
Tiles in one apartment in Amadeo II (photo Beodom).
In a next article, we will detail the geothermal part of the system.