Connection of the geothermal heat pump with the vertical probes
| 18 September 2009 - Comments (0) | Construction |
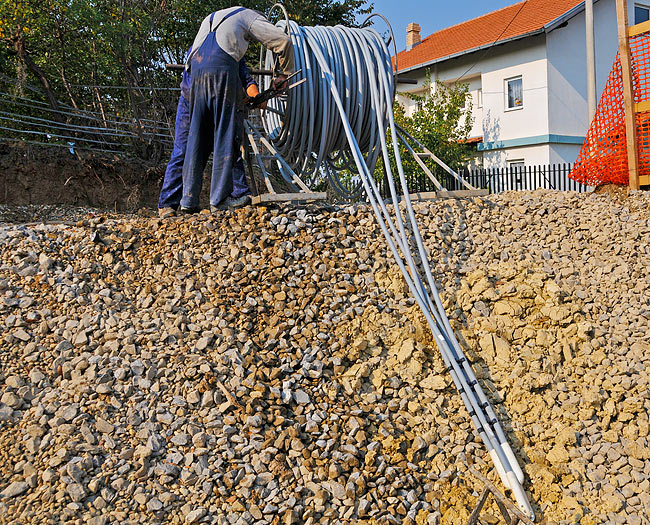
 In a previous article, we explained the drilling of the boreholes and the installation of the vertical geothermal probes. We now look at the connection, from the probes, to the geothermal heat pump located in the service room inside the building. The first step is to extend each probe and install that extension underground to reach to point where to enter the building.
Digging trenches for the passage of the probe extensions
The geothermal probes are located below the object. They need all to be gathered on the side where we will be able to let them inside the underground parking. From each individual probe to the point where they enter the building, the probe is extended and that extension is buried in a trench about 1 meter deep.
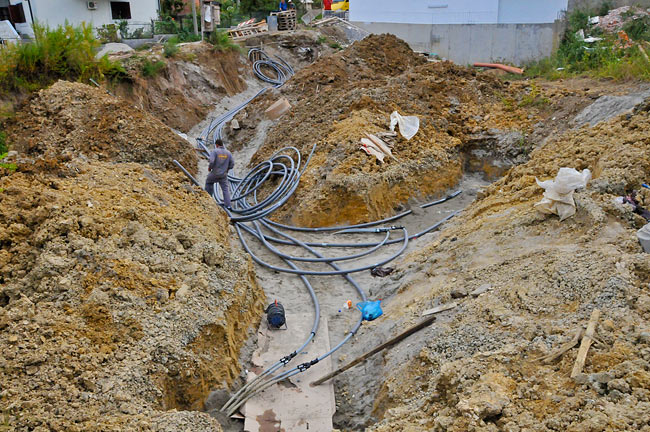
Trenches to pass the probe extensions (photo Beodom).
Joining the 2 loops of each probe into one
Each Raugeo probe is made of 2 independent loops in a U-shape positioned in 2 perpendicular plans. One loop is 200 meters long (100 meters down and 100 meters back up). So one Raugeo probe in a length of 100 meters is in fact made of 400 meters of PE-Xa pipe.
The 2 independent loops forming the Raugeo geothermal probe (photo Beodom).
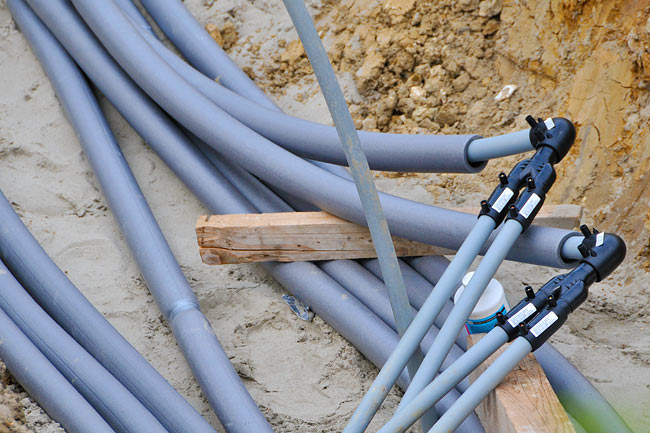
Those 2 loops for one probe are joined together to form a single loop. Therefore, for 5 probes, we do have 5 loops. Pipes used to join the 2 loops of each probe are identical to the pipes of the probe, beside having a bigger section to allow greater flow.
Joining the 2 loops of one geothermal probe into one loop (photo Beodom).
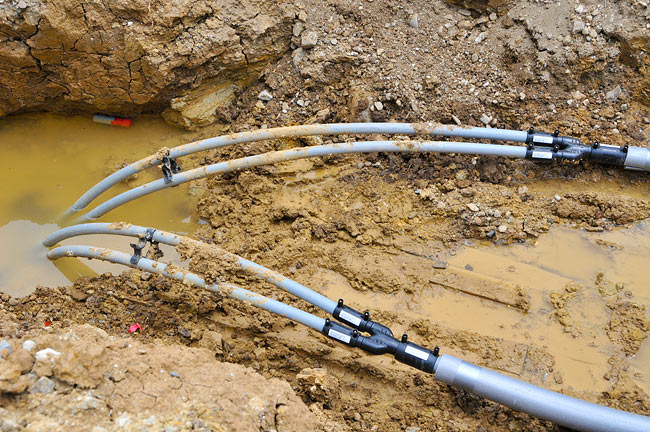
From each loop, the 2 pipes have to be distinguished as the hot pipe and the cold one. In heating mode, cold glycol will first come from the heat pump into the cold pipe, circulate the loop underground, and eventually come back warmer via the hot pipe of the loop. In cooling mode, it is the exact opposite. Glycol will first come hot, and become cooler after circulation in the loop underground.
For this reason, it is important to separate cold pipes from hot pipes, by leaving a sufficient distance in between them. If that is not possible because of the configuration of the land, the connecting pipes must be insulated to prevent heat loss when cold and hot pipes are too close. That is the solution we applied.
Connecting pipes need to be insulated to prevent heat losses (photo Beodom)
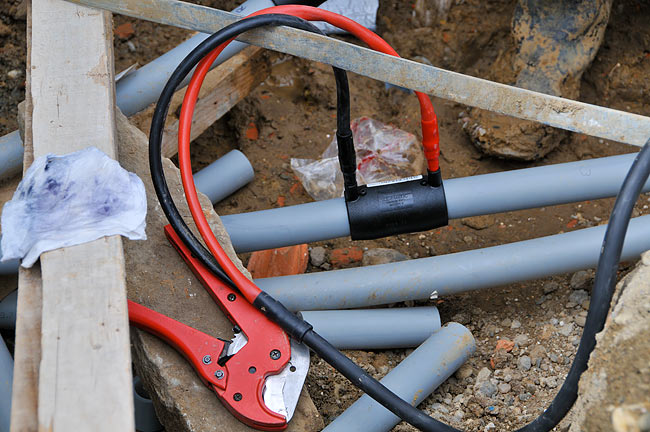
Soldering connections with ElectroFusion fittings
Each connection between 2 pipes is a very critical point. Leaks are not an option as pipes will be burried underground. That is the reason each connection is done very carefully with a proven system using Plasson ElectroFusion Fittings.
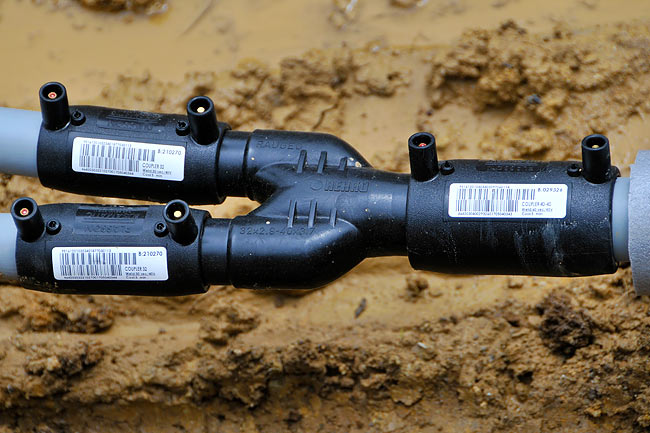
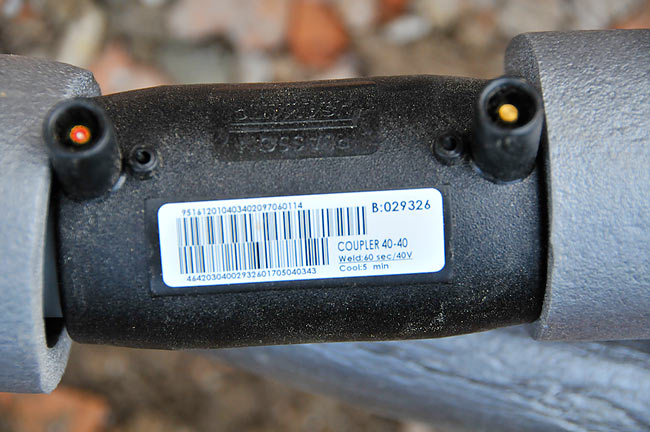
Plasson Electrofusion Fittings (photos Beodom).
Those fittings are specially designed for securely connecting polyethylene pipes. They function by melting a material with an electric current that is electronically controled via an external device. Everything being automated, there is no place for operator error.
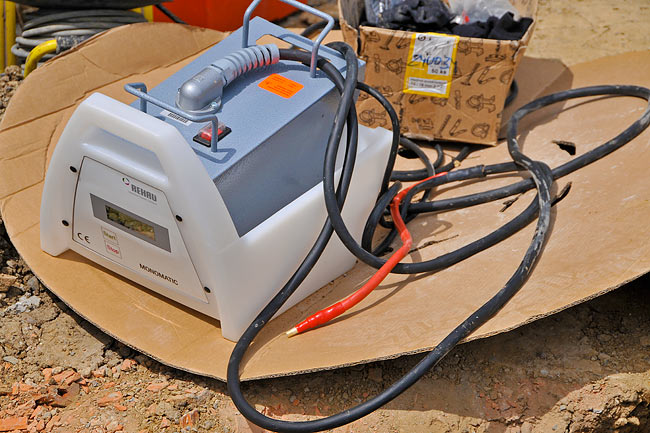
Electric generator and controlling device for the electrofusion fitting (photo Beodom).
Electrofusion of a fitting in process (photo Beodom).
Below is a video showing the steps for the electrofusion of a fitting. The cleaning of the section of the pipe going in the fitting is a very important step. That has been shortened on the video but the operator from our installer Kombo does a meticulous job sign of great professionalism.
Entering the building
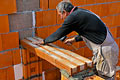
There are 2 possibilities to enter the building. From the ground, passing through the footer and armed concrete slab, or from the side, passing through the armed concrete wall. The second option is somewhat easier to implement and it is the one we chose. The space for the passage of the probes was left in the wall at the planned position.
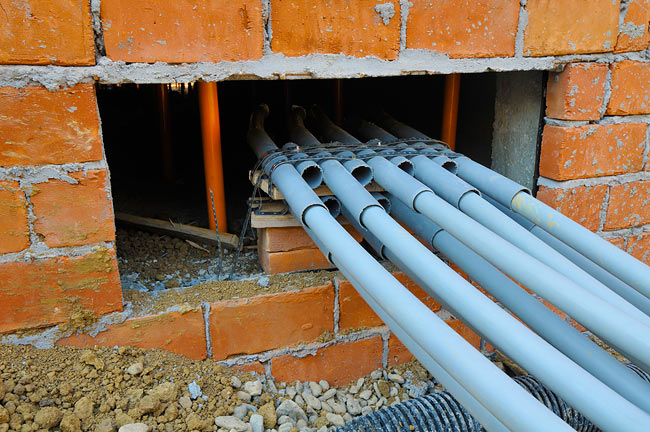
The 5 geothermal probes entering Amadeo underground parking. There are 5 loops which make 10 pipes (photo Beodom).
Pipes of the probes were passed into protective pipes and the space was filled with concrete. Then, several layers of cold hydro-insulation were passed to waterproof the concrete and the space around the probes.
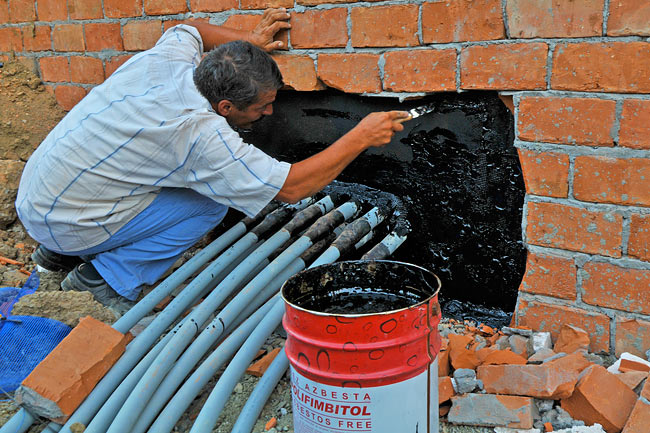
Waterproofing the passage of the probes inside the building (photo Beodom).
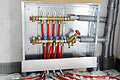
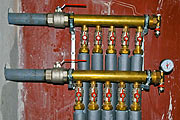
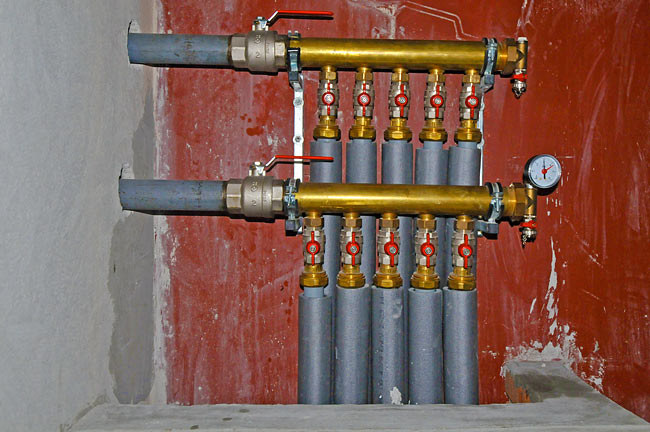
In the building, the ends of each loop are gathered together on a rack fixed on the wall and connected to 2 large manifolds. One manifold is for the outgoing flow from the heat pump going to the underground loops, and the other for the incoming flow coming back from the underground loops.
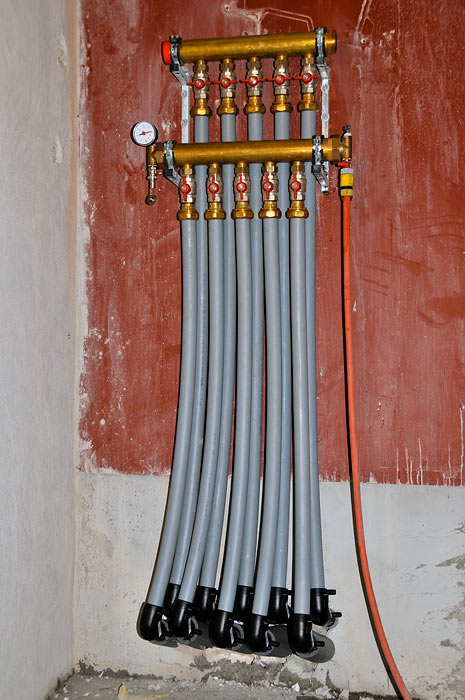
Gathering the end of each loop in 2 groups on 2 manifolds (photo Beodom).
Connection to the heat pump
Eventually, each manifold is connected to the heat pump. In our case we passed through one wall as the heat pump was installed on the other side.
Connecting the manifolds to the heat pump (photo Beodom).
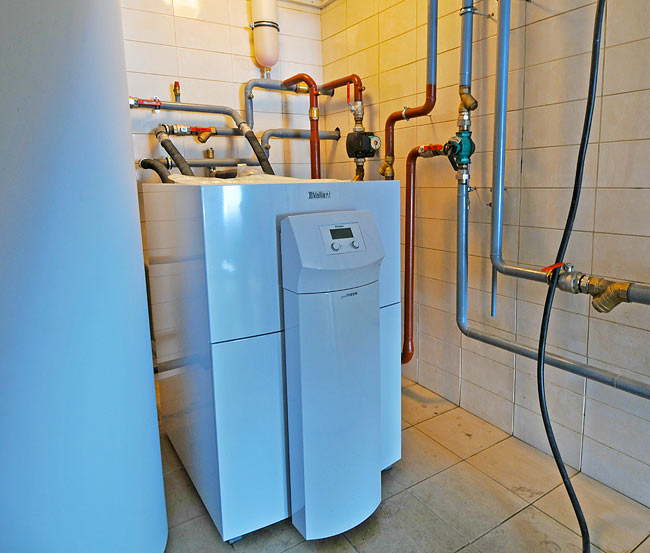
Vaillant geothermal heat pump GeoTHERM VWS 300/2 connected to the geothermal probes (photo Beodom).
In another article, we will dive into the functioning of the geothermal system and the distribution. Until then, you can enjoy this short tour of the geothermal installation below.