Installation of Schöck Isokorb elements on the balconies of Amadeo
| 03 September 2008 - Comments (0) | Construction |
 One of the innovation in Amadeo, in order to implement energy efficiency, is the use of Schöck Isokorb that prevents thermal bridges on the balconies. The making of the first floor slab was the occasion to install the first Isokorb elements. We had the chance to have a Schöck engineer, coming specially from Austria to help us out.
What's wrong with balconies
Standard balconies are made as an extension of the inner slab going outside. That continuous reinforced concrete creates a thermal bridge that conducts heat from inside to outside. This is a common problem with balconies.
One way to solve it is to place a thermal break at the external edge of the wall, effectively cutting the continuity of the concrete slab. Only the reinforcement passes through the thermal break. The balcony becomes suspended to the main slab instead of being part of it.

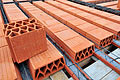
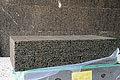
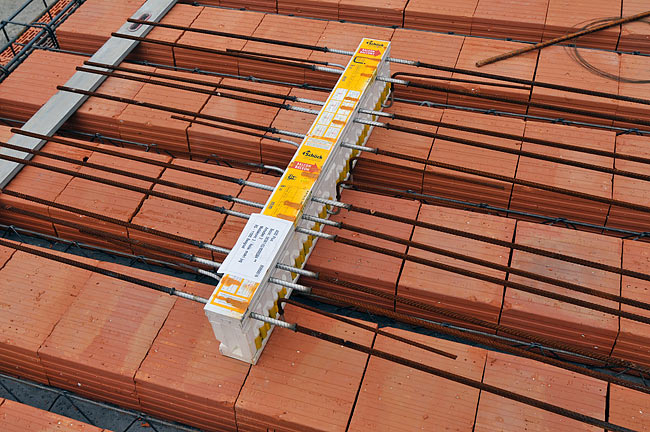
Stacks of Schöck Isokorb elements, ready to be installed.
That is exactly the solution Schöck Isokorb implements, in a way that maintains the structural integrity of the balcony.
Installation of Schöck Isokorb on the first balcony
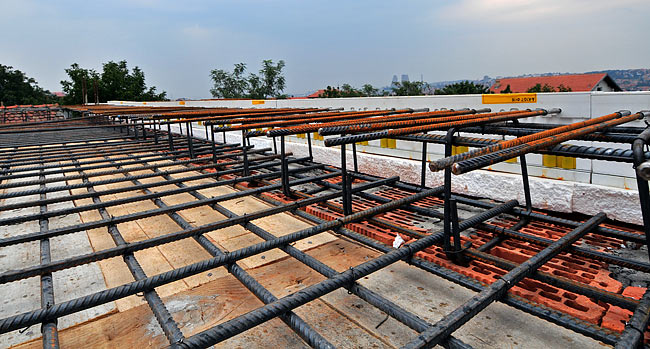
There are several types of Schöck Isokorb elements, that are more or less reinforced, depending of the size and shape of the balcony. For this first balcony (apartment-d), that is long and narrow, we used Schöck Isokorb Type-K 10/7 all along the long side.
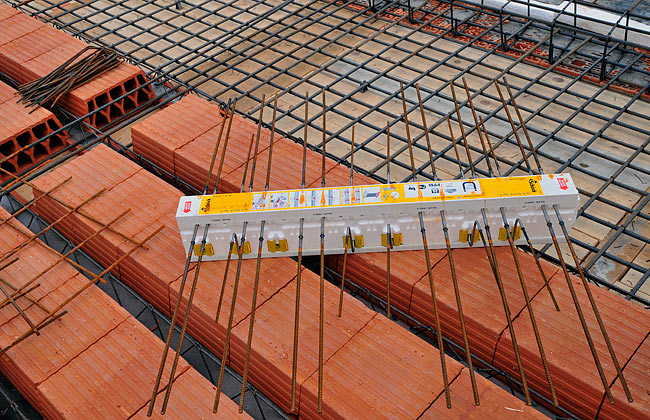
Detail of one Schöck Isokorb Type-K 10/7 element. The yellow parts, in the polystyrene of Isokorb, are special reinforcement that resists against the vertical force of the balcony.
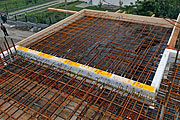
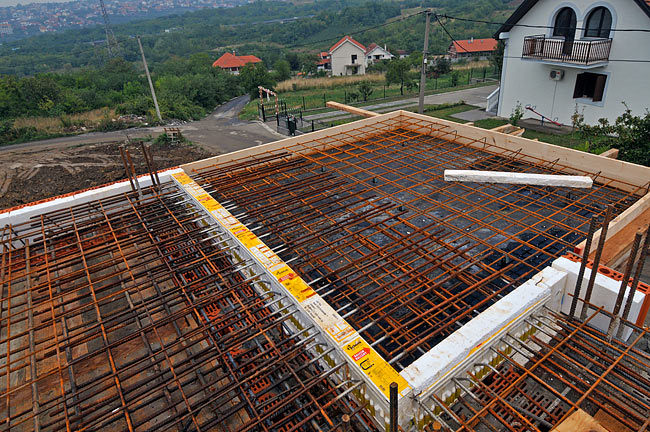
On the floor slab, in front of the balcony, we have to have a field of concrete equivalent in size to the size of the balcony, to counterbalance its weight.
Schöck Isokorb Type-K 10/7 installed on the balcony.
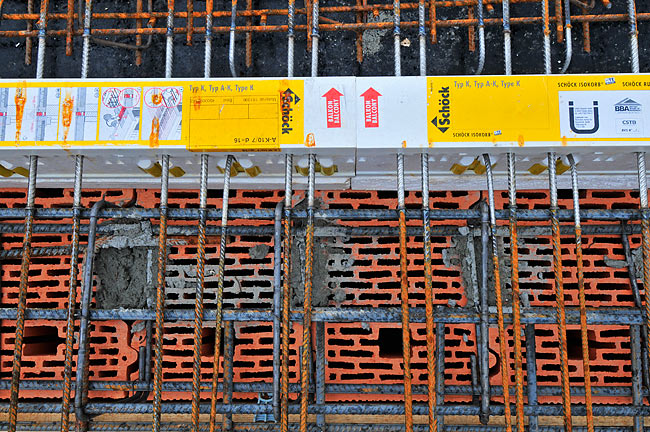
Schöck Isokorb Type-K 10/7 is 16cm tall and 8cm wide. The slab being 21cm, we placed a line of polystyrene, 5cm thick, below Schöck Isokorb. There is no vertical force directly on Isokorb, the tension of the balcony being transmitted by the reinforcement. The balcony slab is only 16cm, matching exactly the height of Isokorb.
Side of Schöck Isokorb Type-K 10/7 installed on the balcony.
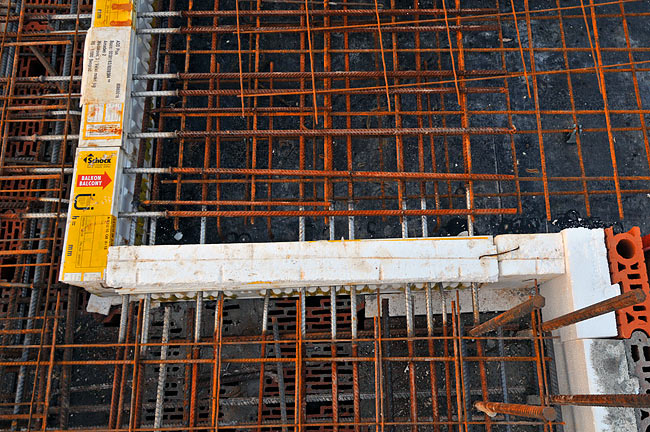
The external side of Schöck Isokorb is exacty aligned with the external side of POROTHERM bricks. In the case there is an external layer of thermal insulation, Isokorb is placed aligned with the the layer of thermal insulation.
Detail of Schöck Isokorb Type-K 10/7 installed on the balcony.
As Schöck Isokorb is very new in Serbia, we had the chance to have a Schöck engineer, Jerney Standeker, coming from the Austrian headquarters, to help us perform that first installation and check it. He was actually the one who calculated the Isokorb elements we needed.
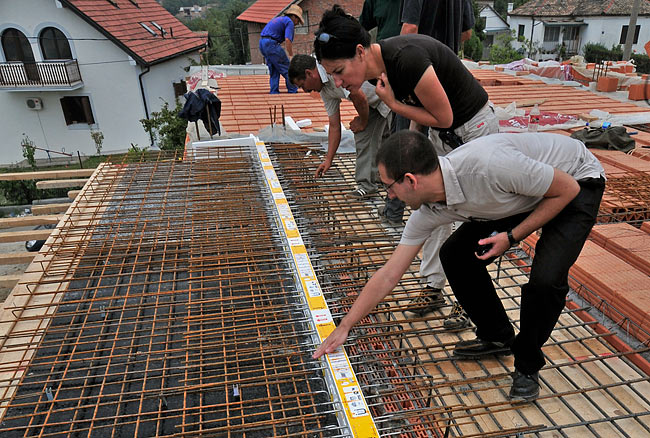
Schöck Engineer, Jernej Standeker, explaining the principles of Schöck Isokorb to Milena Gojković-Mestre (Director of Kuće Beodom).
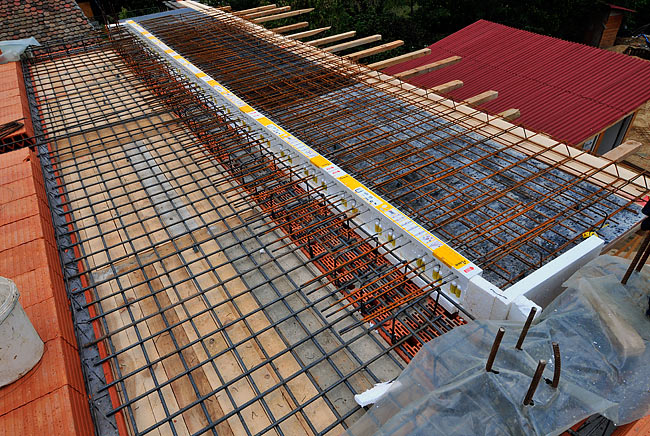
Once the installation of Isokorb is finished, more reinforcement is placed in the field of concrete. Around the edge of the floor slab, POROTHERM cerclage elements are positionned to provide thermal insulation. Visually, following the white thread of polystyrene, it's easy to see the continuity of the thermal insulation, passing through the balcony.

Schöck Isokorb Type-K 10/7 on the balcony once all reinforcement is installed.
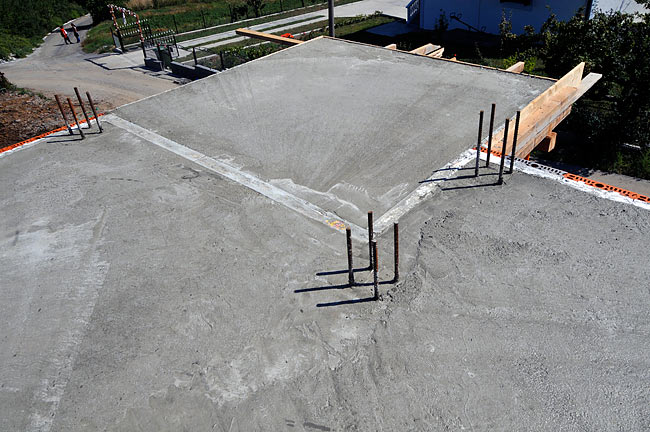
Once concrete is poured, only the top part of Isokorb remains visible.
The finished balcony, with Schöck Isokorb Type-K 10/7, after concrete has been poured.
Installation of Schöck Isokorb on the second balcony
The second balcony (apartment-c) was less long but much wider. So we had to use a stronger type of Schöck Isokorb (Type-K 12/10).
Schöck Isokorb Type-K 12/10 (one of the strongest).
This time, Isokorb was positioned on both sides of the balcony. We had to cut one Isokorb element to make perfectly the long side, while the short side was done with one single Isokorb.
Schöck Isokorb Type-K 12/10 on the second balcony.
Isokorb Type-K 12/10 is 19cm tall. So this time, we placed only 3cm of polystyrene below Isokorb elements on the long side of the balcony. On the short side, we placed Isokorb directly on the slab and 3cm polystyrene on top of Isokorb. That way, the reinforcement of Isokorb elements was able to cross in the balcony slab.
Crossing of Schöck Isokorb Type-K 12/10 in the balcony slab.
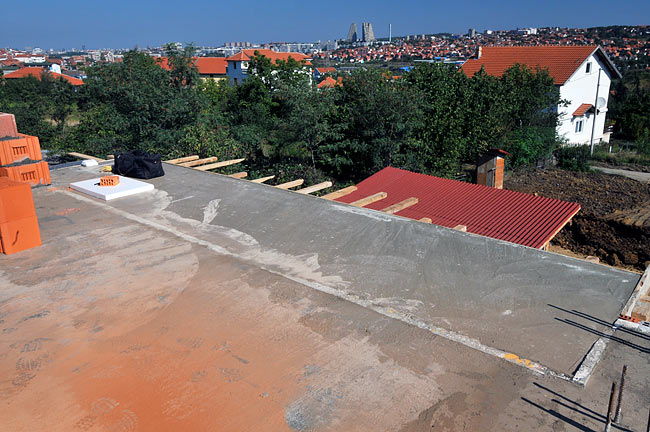
After concrete is poured, it is still possible to follow the white line of thermal insulation going around the slab and passing through the balcony.
The finished balcony, with Schöck Isokorb Type-K 12/10, after concrete has been poured.